

What if a home recovery room feels restorative because of its planning, not its size? A considered home recovery room design places the sauna and cold plunge near the wet area, keeps a dry relaxation zone adjacent, and preserves a clear 30-36-inch path for comfortable movement. Waterproofing, drainage, ventilation, and slip-conscious flooring should be planned together, before finishes are chosen.
It’s easy to focus on the sauna or plunge first, but everyday comfort depends just as much on moisture control, airflow, and the transition between heat and cold. This guide shows how to arrange a recovery zone and plan practical details such as drainage, ventilation, and flooring, so the space works for both equipment and quiet moments between sessions.
Key Takeaways
- Arrange the sauna and plunge as a simple, comfortable sequence, with room to enter, exit, and maintain each unit.
- Shape a distinct recovery zone with comfortable seating, organized storage, and lighting that can shift from activity to relaxation.
- Plan moisture management as a system: coordinate drainage, fresh-air circulation, waterproofing, and flooring suited to wet areas.
- Consider JosmirLuxe Recovery and Compression Technology when you want to complement your thermal setup with dedicated recovery equipment.
Sauna-to-plunge layout for contrast therapy
Plan circulation, clearances, and wet and dry zones together; each affects how the room functions.
-
Plan the Sauna-to-Plunge Route
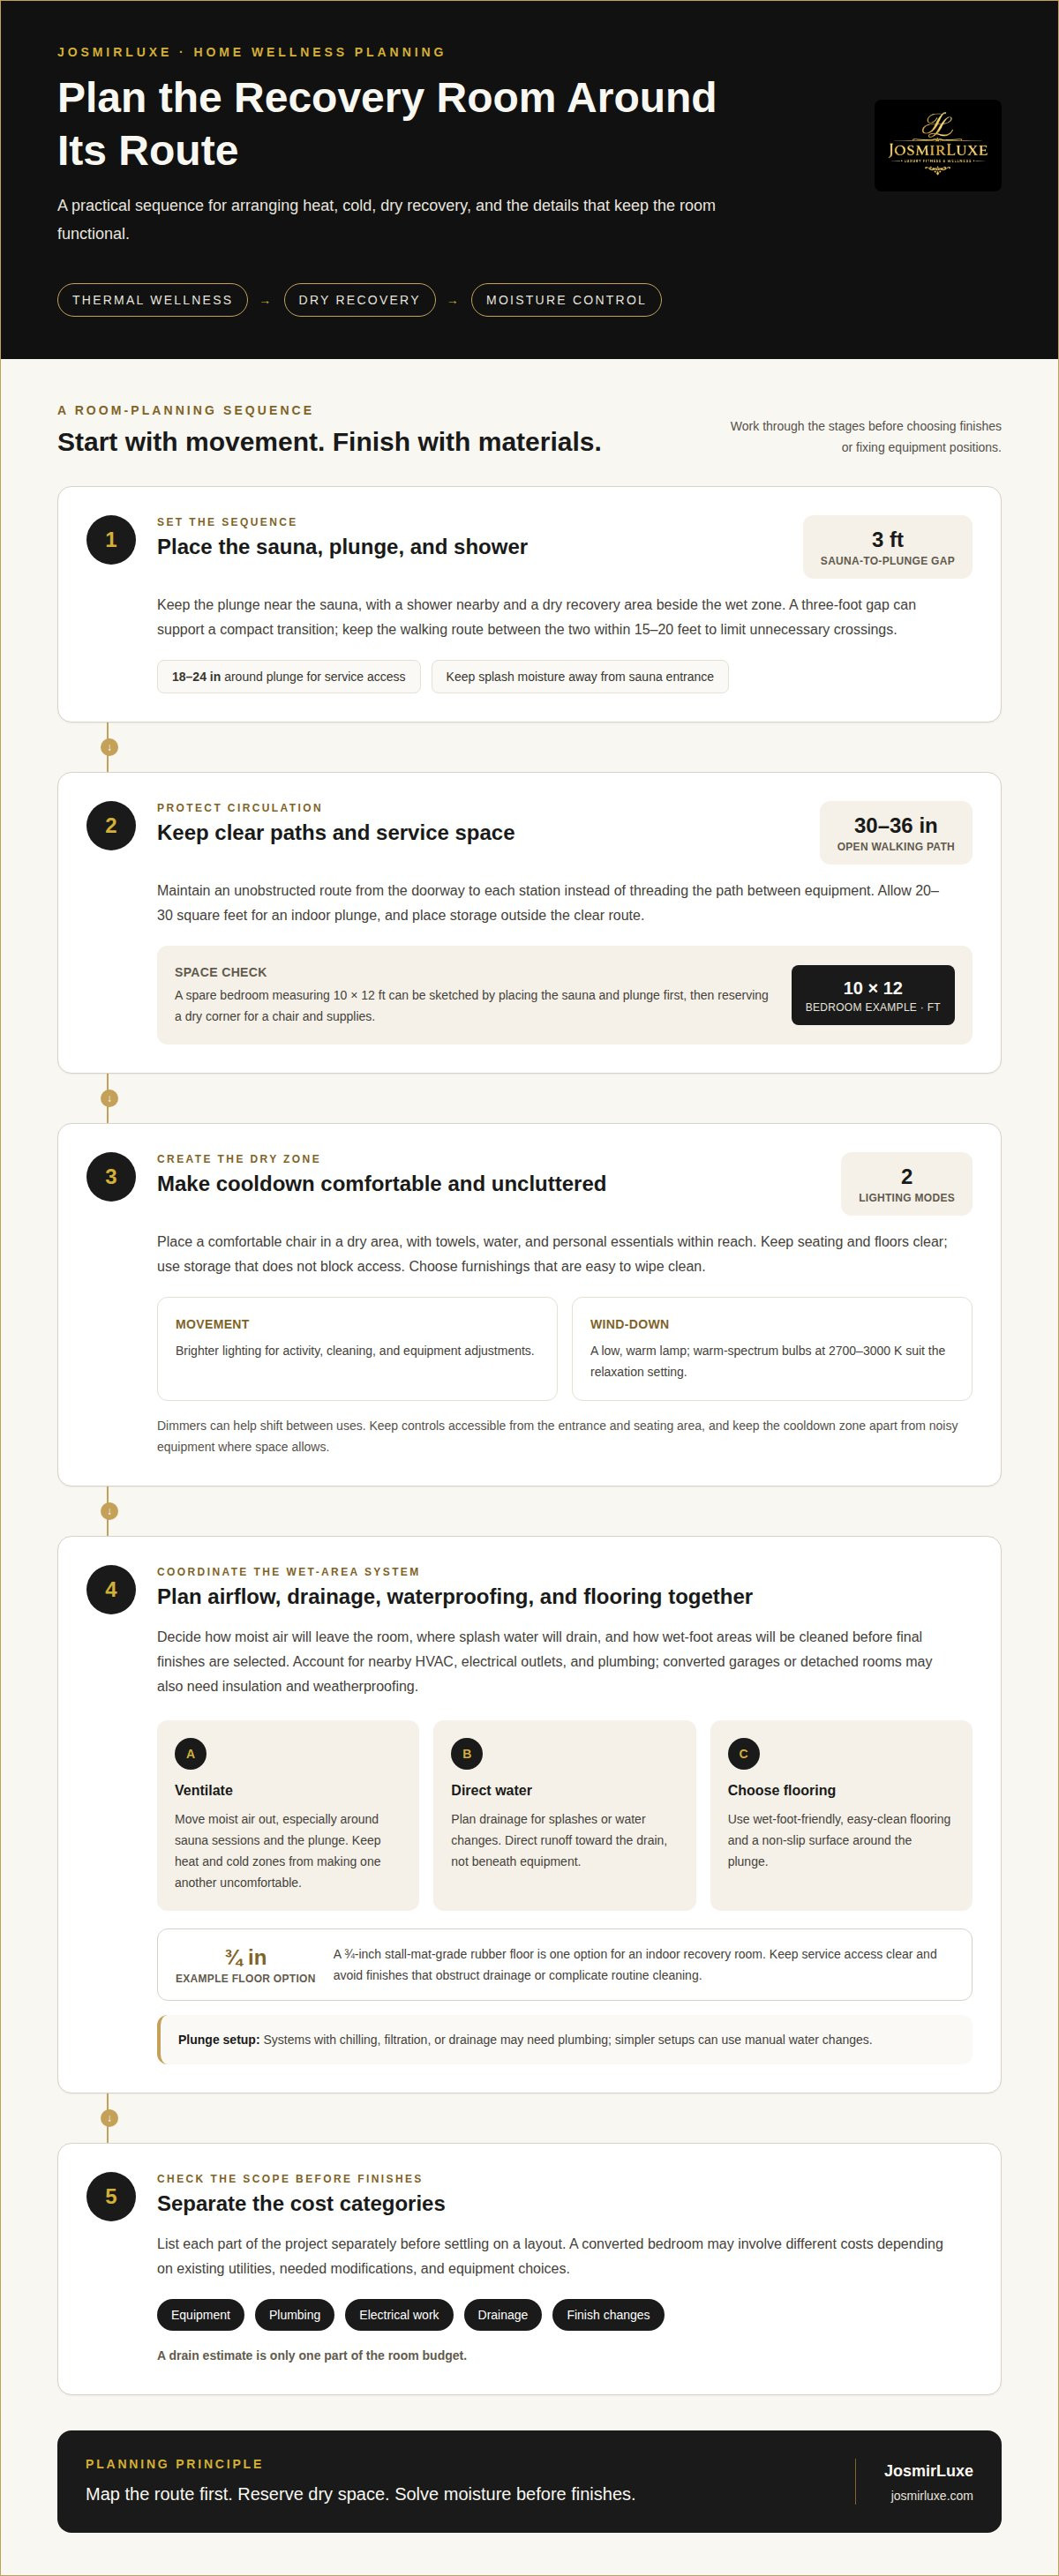
Place the cold plunge near the sauna, with a shower nearby and a dry recovery zone beside the wet area. A three-foot gap between sauna and plunge can support a compact transition, while keeping the walking route between them within 15-20 feet limits unnecessary crossings. Leave 18-24 inches around the plunge for service access, and avoid placing it where moisture reaches the sauna entrance.
-
Map Clear Walking Paths
Keep a 30-36-inch path open from the doorway to each station, rather than threading it between equipment. Allow 20-30 square feet for an indoor cold plunge, then position storage outside that clear route. For an older adult or someone recovering from surgery, prioritize an uncluttered route and accessible seating; don’t assume contrast therapy is suitable during surgical recovery.
-
Adapt a Spare-Bedroom Layout
In a 10-by-12-foot bedroom, sketch the sauna and plunge first, then reserve a dry corner for a chair and recovery supplies. After surgery, set up the room around the discharge plan: keep prescribed medical supplies, mobility aids, and essentials within easy reach. Possible home modifications include clearing the route, relocating obstacles, and arranging stable support where needed. An older patient may benefit from the same clear access and reachable storage.
-
Estimate Setup Costs
List equipment, plumbing, electrical work, drainage, and finish changes separately before choosing a layout. Converting a bedroom may involve different costs, depending on existing utilities, necessary modifications, and equipment choices. Don’t treat a drain estimate as the full room budget.
Recovery zone seating, storage, and lighting
For comfort and safety, include supportive seating, reachable essentials, clear surfaces, and lighting suited to each activity. Keep the recovery area distinct from equipment and wet zones.
-
Arrange Recovery Seating
Place a comfortable chair in a dry cooldown area, easy to reach after sauna use or exercise. Store towels, water, and personal essentials nearby, while keeping the floor and seating uncluttered. A small table can keep items within reach without turning the relaxation zone into storage. Choose furnishings that are easy to wipe clean.
-
Set the Lighting
Use layered lighting rather than relying on a single bright overhead source. Dimmable ambient lighting can make the room feel calmer, while focused lighting helps with cleaning and equipment adjustments. If you add a red-light therapy station, assign it a defined spot with clear space around the device. Follow its operating instructions and plan electrical access before finalizing the layout.
-
Create a Quiet Cooldown Area
Where space allows, separate the chair from noisy workout equipment and sauna controls. Calming music, nature sounds, or guided meditation can help create a quieter transition between activities without filling the entire room with sound. Keep towels and a water bottle nearby, and position storage so it doesn’t block access or add visual clutter.
-
Coordinate Workout and Wind-Down Lighting
Plan at least two light sources: brighter lighting for movement and a low, warm lamp for relaxation. Warm-spectrum bulbs at 2700-3000 K suit the wind-down setting, while dimmers let the room shift between uses. Keep controls accessible from the entrance and seating area. This consistent arrangement makes the lighting practical without adding unnecessary infrastructure.
Drainage, ventilation, and flooring
A home recovery room design should treat moisture control as a system: drainage, airflow, waterproofing, and flooring must suit the plunge and sauna areas. Coordinate these decisions before finishing the room.
-
Set Up Ventilation
Plan ventilation to move moist air out of the recovery space, especially around sauna sessions and a cold plunge. Fresh air matters more than artificial fragrance, and good airflow helps prevent moisture from lingering. Separate heat and cold zones so one doesn’t make the other uncomfortable. During a remodel, account for nearby HVAC, electrical outlets, and plumbing. In a converted garage or detached room, plan for insulation and weatherproofing as well as ventilation.
-
Choose Flooring for Hygiene
Select flooring suited to wet-foot traffic and easy cleaning. A 3/4-inch stall-mat-grade rubber floor is one option for indoor recovery rooms; pair it with a non-slip surface around the plunge. Plan drainage where splashes or water changes could leave standing water, and direct runoff toward the drain rather than under equipment. Cold plunge systems with chilling, filtration, or drainage may need plumbing, while simpler setups can use manual water changes. Keep service access clear, and avoid finishes that obstruct drainage or complicate routine cleaning.
JOSMIRLUXE: Recovery and Compression Technology
JOSMIRLUXE offers Recovery and Compression Technology for a home suite that extends beyond sauna and plunge sessions. It can suit people who want a dedicated recovery option alongside training equipment, while keeping each activity distinct in the room’s layout.
Choose equipment to suit your routine and available space. A recovery-focused setup can pair the compression system with a quiet place to sit, while a training-led suite may center on a functional trainer or smart home gym system. The right combination depends on whether your priority is structured exercise, recovery, or both. Plan convenient access to outlets and storage as you finalize the room.
If you’re refining your recovery suite, contact JOSMIRLUXE to discuss the equipment options that fit your space and routine.
Shape a Recovery Space Around Your Routine
A thoughtful home recovery room design can evolve with your training habits instead of being fixed around equipment alone. Before making changes, consider which activities you’ll use regularly, how you want to move between them, and what should remain flexible as your routine shifts. This helps keep the room purposeful and comfortable over time.
JosmirLuxe offers premium fitness and recovery equipment for a considered home wellness environment. Explore the options and choose what aligns with your space and priorities, rather than adding equipment simply to fill the room.
Explore JosmirLuxe’s fitness and wellness equipment as you plan your next step. A well-considered space can make it easier to return to the routines that matter to you.
Frequently Asked Questions
What Is a Home Wellness Sanctuary?
A home wellness sanctuary is a dedicated space for recovery, movement, and relaxation. It might include a sauna, a quiet place to sit, or training equipment, depending on the household’s routine. Its defining feature is purposeful use: each element supports an activity without making the room feel like storage or an extension of the main gym.
What room layout and furniture are best for home recovery?
Choose a layout that separates active equipment from quieter activities, then select furnishings for the way you’ll use the room. For example, a compact side table beside a chair can hold a book or water, while closed storage keeps personal items out of sight. Keep upholstered seating away from heat and splash zones, where moisture and temperature changes may affect materials.
How to make a home recovery room accessible for limited mobility?
Make essential activities possible without frequent bending, reaching, or stepping over objects. Keep frequently used items within easy reach from a seated position, choose seating with armrests, and make controls accessible without crossing the room. Consider door swings and turning space before placing equipment, and remove loose rugs or cords that could become obstacles.
What are the best lighting, temperature, and ventilation settings for a recovery room?
Use adjustable lighting to suit different activities, with warm-spectrum bulbs at 2700-3000 K for a softer relaxation setting. A bedroom used for recovery may be kept at 65 degrees. Ventilation should help clear humid air after heat sessions; use a fan or improved airflow if the room becomes hot during movement. There isn’t one temperature setting for every activity.
What safety risks should be addressed in a home recovery room?
Plan for wet floors, standing water, blocked routes, and electrical equipment near splash zones. Keep cords away from walkways, dry surfaces after water use, and leave equipment accessible for routine cleaning and maintenance. Heat and cold exposure may not suit everyone, so don’t assume contrast therapy is appropriate during illness, injury, or recovery from surgery.